DIY cooling tea tree toner

for years, i religiously purchased & repurchased tea tree water, that toning spray from lush just about everyone seems to enjoy. it was my favorite way to refresh on hot & muggy summer days.
i'm just not with spending money on things like that anymore, especially when i can easily replicate quite a few of the products i used to buy. but live without, it i'd rather not.
here is a super quick, simple way to create a similar toner to tea tree water, for a fraction of the price. i have linked the exact products i use below for reference. i found them all at my local whole foods.

WHAT YOU'LL NEED
2 oz. alcohol-free witch hazel - here
~15 drops organic tea tree essential oil - here
~10 drops cold-pressed organic rosehip seed oil - here
2 oz.-size empty spray bottle - here

METHOD
unscrew the spray nozzle from your bottle.
pour in the witch hazel until you reach the bottom of the bottle's neck.
add in your oils. shake well to incorporate.
always shake before using as the oils will separate from the witch hazel. 

BENEFITS
witch hazel is one of my favorite natural skincare ingredients, full of antioxidants & astringent properties that help fight acne & calm down oiliness. tea tree oil, a natural anti-microbial, supremely helps many people with acne including myself. i often dot it on pimples to dry them out & prevent any bacteria from spreading, & it definitely works. because it can be drying, i incorporated cold-pressed rosehip seed oil to add lightweight moisture for the skin while helping prevent signs of ageing, as well as healing acne & scars.

all in all, this toner helps prevent & treat acne & cut down the oiliness in your skin, a must as summer approaches, without drying out your complexion. it has a fresh herbal scent & will leave a lingering cool feeling on your skin. i spent a little under $30 to get all the supplies i needed & got around 5-6 bottles of spray this way - which would cost you around $50-60 at lush. best part of all is i know exactly what is going into it! no weird ingredients or fillers.

let me know if you try this out for yourself & how you liked it.

talk to you soon xx

DIY body scrub bar

Your skin is probably gonna be a lot more exposed in the heat of the summer, which admittedly means it's time for me to shave my legs more often than once a month (tmi, perhaps?). Just like with the skin on your face, your entire body can sometimes use a good scrubbing to remove surface grime thoroughly. The result is brighter & softer skin at the expense of a couple of minutes out of your week.

To make this scrubbing bar, you need just 2 ingredients that you probably already have in your home: 3/4 cup of the coffee grinds left in your coffee filter & 1/2 cup of organic, virgin coconut oil. If you have some essential oils on hand they would make a great addition to your scrub bar, but honestly it smells really damn good as it is.

Method: Scoop your coffee grinds from the filter into a plastic tupperware. Add in the coconut oil, at room temperature. Mix it all together; you should end up with a really thick mixture. If it's too thick, add a little bit more oil & vice versa. Using a spoon, shape the mixture so that it's not touching the sides of the tupperware (this will make for easier removal). Once your done smoothing the whole thing over, place it in the freezer. After about 2 hours, it should be ready to use.

Use this bar in the shower - After washing, wet it & apply by directly scrubbing with the bar, or alternately rub it between your hands (it is cold!), then apply to your skin. Use your hand to rub the grinds in circular motions all over your body (you can even use this on your face). The coffee is obviously the scrubbing agent, while caffeine in it also helps encourage circulation. This is great for cellulite & scarring. The coconut oil is so moisturizing, but because you use this in the shower you don't end up a greasy mess. Pat your body dry. You don't have to use any moisturizer after using this bar. Stick the rest of the bar back in the freezer until you're ready to use it again.

I love this because it's super inexpensive & extremely easy to throw together. It's also effective! It's gentle on my sensitive skin, smells like an Almond Joy & makes my skin so soft.
One bar will hold for approximately 3 uses.

Until next time ♡

pear upside down cake


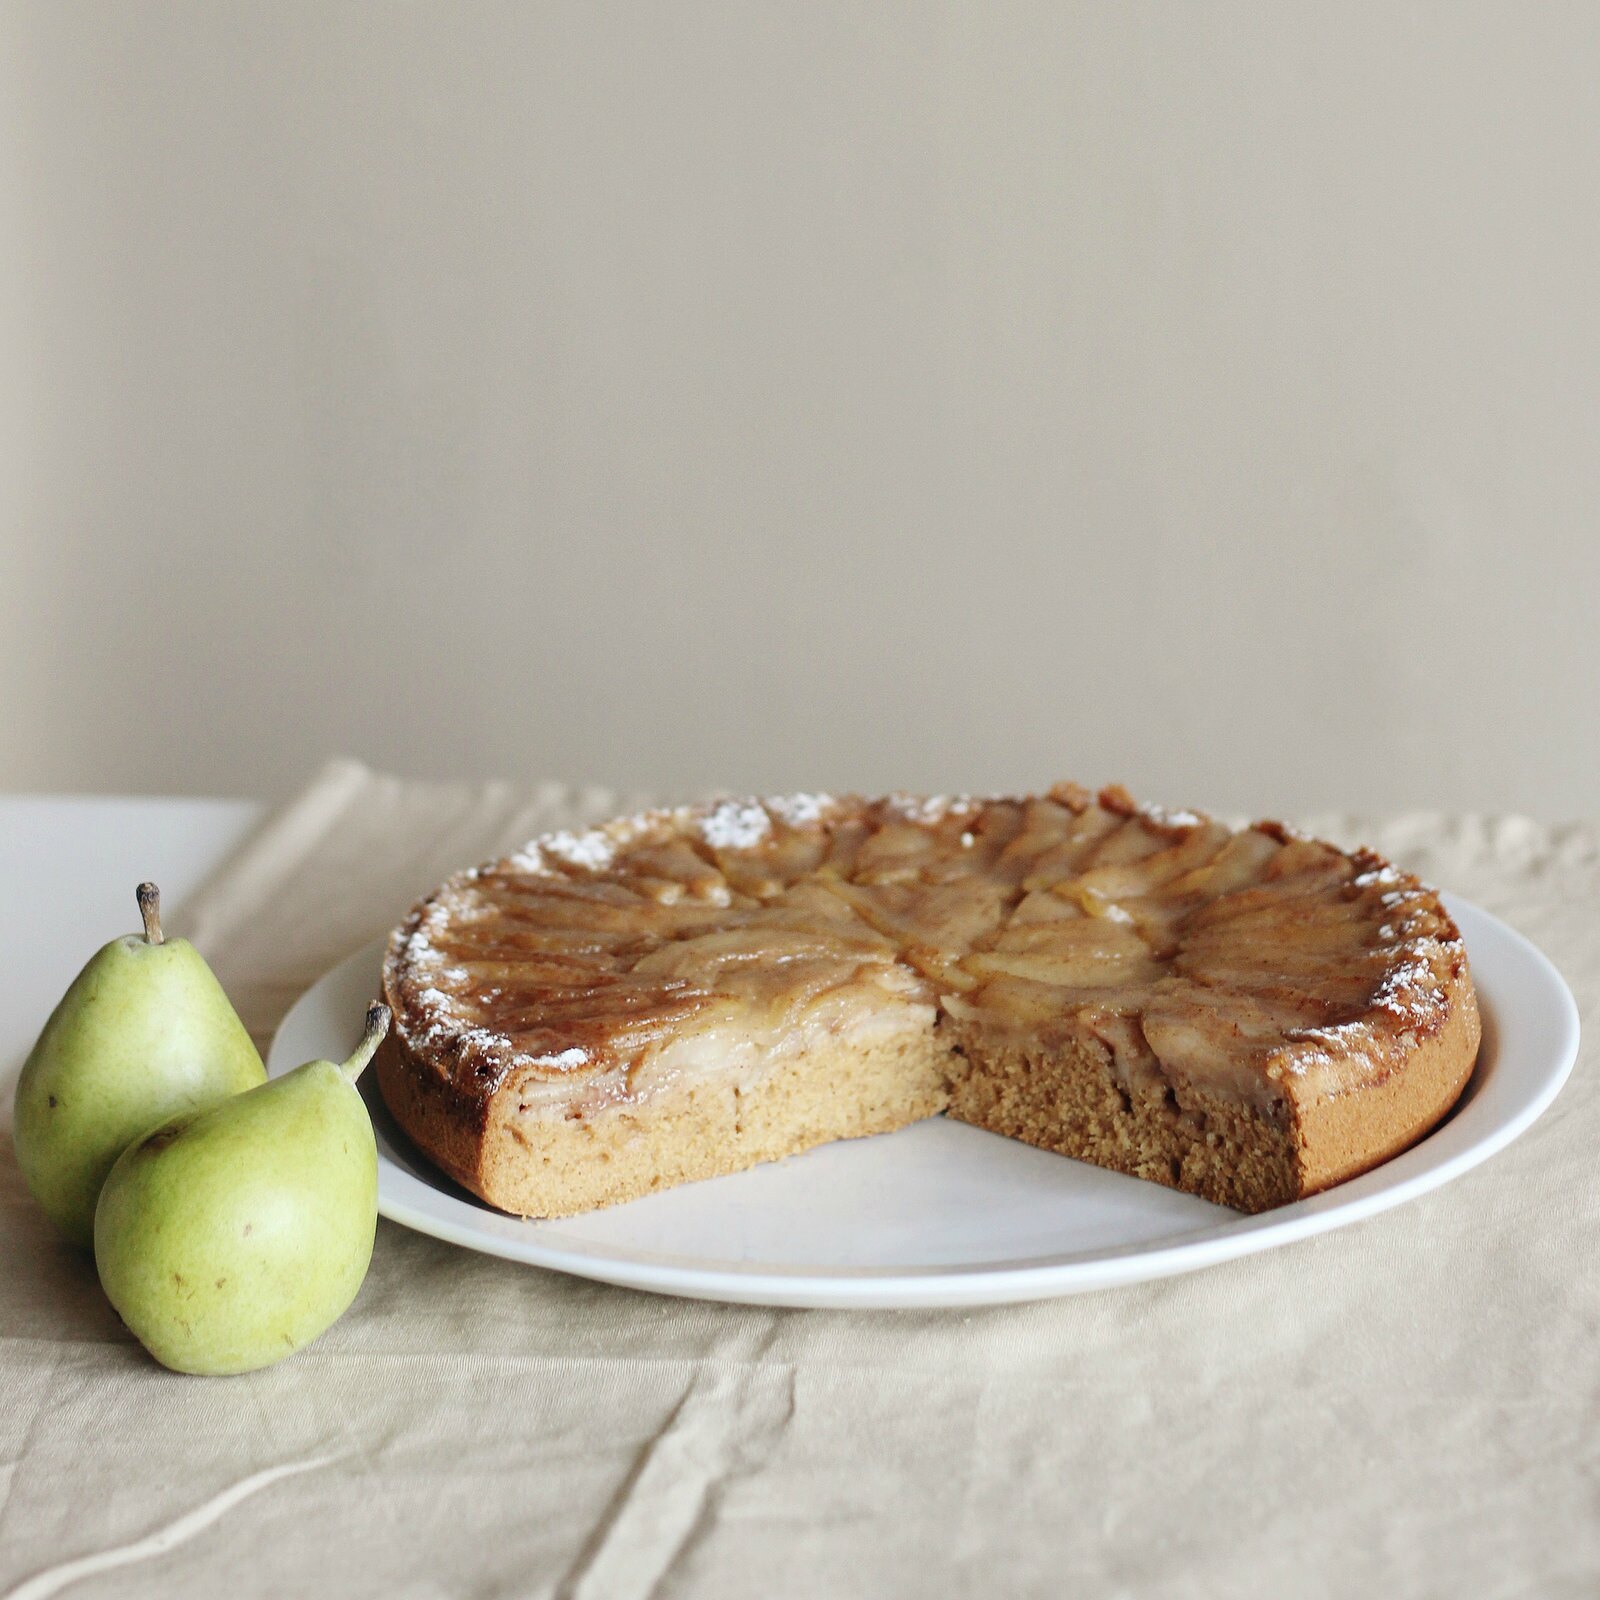
I love pretty food, the reason being that food doesn't require much work to be made pretty. Carelessly assembling & plating food isn't an option for me, & that's why I love this cake. It requires a little bit of extra patience & effort to put together, but the final product is stunning & makes you look like a total professional.

Upside down cake is typically made with apples. But when you don't have apples, you can make the basically informed decision that pears will do the job just fine. Luckily they did, & my expectations for this cake were exceeded. I'd like to say that I used d'anjou pears because they're sturdier & I put thought into all this, but the truth is they're what I had on hand. If you happen to have apples though, go for it!

The best part of this recipe is that it's not terribly unhealthy & cruelty-free. Because the ingredients in this cake are commonly found in most households, you can easily bake it & have it over to your friend's or family's home for the holiday festivities. It makes for a beautiful & tasty gift.


Pear Upside Down Cake
Serves 8

Pear layer
4-5 small D'anjou pears, peeled, cored & sliced
1 tsp vegan butter or coconut oil
3 tbsp vegan brown sugar
1/2 tsp cinnamon

Dry ingredients
1.5 cups all-purpose flour
1/2 tsp baking powder
1/2 tsp baking soda
1/4 cup vegan sugar
1/4 cup vegan brown sugar
1/4 tsp salt
1/2 tsp cinnamon 

Wet ingredients
1 cup unsweetened soy milk 
1/2 tsp vanilla extract
1/4 cup maple syrup or agave nectar 
1/4 neutral oil (i.e. canola, sunflower)
1 tsp apple cider vinegar or lemon juice 

Preheat the oven to 355 F. Grease your cake tin with the butter or coconut oil very well.Cut a circle of parchment paper to fit the bottom of your pan (this will prevent the pears from sticking). Grease the parchment paper as well, then place inside the tin.

To create the pear layer, begin by mixing the brown sugar & cinnamon together in a bowl. Follow by squeezing lemon juice on the pear slices. Begin assembling the slices on top of the parchment paper in whatever pattern you prefer. Once you have a full layer covering the bottom, sprinkle half of the brown sugar/cinnamon mixture on top as evenly as possible. Add the last layer of pear slices & repeat.

In a large bowl, mix together the dry ingredients. In a separate bowl, mix the wet ingredients together except for the vinegar. Pour over the dry mix & stir until incorporated without over-mixing. Lastly, add the vinegar & stir to incorporate.

Pour the cake batter over the assembled pear layer. Lightly shimmy  the tin to even out the batter. Place in the preheated oven & check it at 45 minutes by inserting a toothpick in the center. If it comes out clean, the cake is done. If not, add 5 minutes of baking time until the center is cooked. Time will vary depending on your oven/altitude.

Allow to cool in the tin for at least an hour. Carefully remove it, then plate it upside down so the pear layer is on top.

Let me know if you try this recipe out, & what you think of it! If you have a recipe you'd like to share with me, I'd love to give it a try in my kitchen.

Until next time!
grass moon. All rights reserved. © Maira Gall.